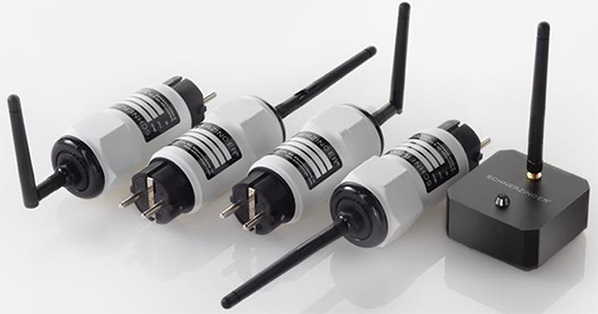
 The multi guard is a set of at least two products: a master (a 7x7x3.5cm aluminium box with 11cm long antenna) and one or more units designed to plug into a Schuko outlet. The units are of three types: phase, earth and room respectively. The kit I received included four units: 2 x 'phase', one 'earth' and one 'room'. The multi guard uses giga cancelling tech to clear up electrical interference radiated into our environment from the domestic power grid. The multi guard 'phase' aims at the current-carrying legs of our AC. The multi guard 'earth' aims at its ground line. The multi guard 'room' cleans up the electrical interference fields that radiate into the room through our hifi's power cables. The manual advises to install the three units in the sequence mentioned. Similarly to the grid protector power cable, the units mount to the EU/Schuko plug in correct phase. Here my multimeter was most useful. Another similarity with the grid protector is that the multi guard master unit has a power switch that can be set to 0 or I and II with the 12V SMPS. The manual suggests a certain logic to deploy the phase, earth and room units, which with a grid protector in the same room results in:
In my case, I plugged 'phase' as recommended and 'earth' and 'room' into outlets on the rear wall of my listening room.
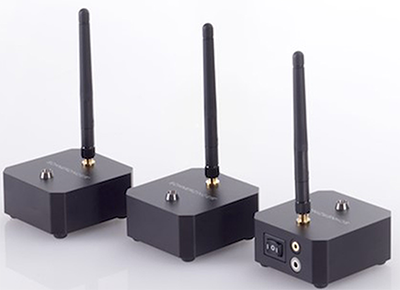 The piccolo protector consists of at least two units, physically identical and indistinguishable from the multi-guard master unless we look at the label underneath. Again, we have a master and one or more satellites. I received one master and three satellites. The master can be fed by 12V SMPS and in that case its operational intensity level of the giga cancelling technology can be set to 0 (no SMPS required), I or II. The satellite switches always remain at 0. The piccolo protectors operate in the nearfield since their cancellation action radiates ~1m. For this reason maximum efficiency locates the various satellites in room areas where interference fields peak. This we can't know in advance so we must take time to experiment with various positions. As a general rule, the manual indicates that the master should sit between the speakers then shares some qualitative criteria for the satellites based on their expected effect on the soundstage:
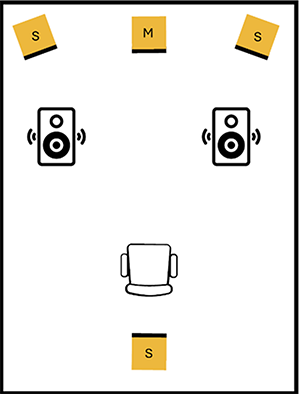
In all cases the optimal height is between 1.1-1.8m. Given that I had three satellites, my starting point was as shown below left.


 The EMI protector looks almost identical to the grid protector. Its purpose is quite different though as it leverages giga cancelling technology to address high-frequency EMI. Compared to the piccolo protectors, it has a larger cleansing radius of up to 3m. It is suggested to place the EMI protector at locations that are especially meaningful within the room like between the speakers, close to the rack or even at the listening position. Again, experimentation is encouraged. Similar to the other master units, the effect's intensity can be increased from default 0 to level I or II via the central rear rocker. The other switches are again 1 for bandwidth, 2 for clocking. Here we get another nine possible combinations to experiment with. All protectors and the multi-guard master must once a year connect to AC power via the supplied SMPS for just 15 minutes to reboot their operational efficiency. Since they do not use batteries, this 'clearing' or 'reset' is not to be interpreted as any recharging. One important note underlined in the manual and diligently followed by me is that both grid and EMI protectors generate a sort of memory/buffer effect whereby their interference cancellation continues to be active for up to one day. Here is what the manual says about the EMI protector: "Remove the antenna, place the device on the floor (preferably on its side) and set the middle 'power' switch to 0. Keep this state for several hours, ideally overnight. This ensures that the EMI protector no longer has any effect. Once reconnected, interference will be quickly cleared again". Say goodbye to quick A/B tests.
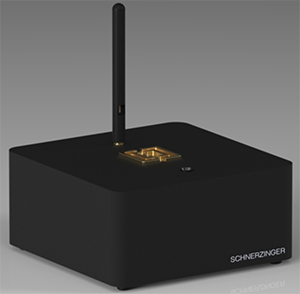
 The reflector presented at the 2025 Munich High-End show was the first incarnation of the giga cancelling Plus+ technology, a significant advance Schnerzinger achieved over the previous generation in the EMI and piccolo as a result of over six years of R&D. The reflector targets EMI interference from radio waves, mobile phone masts, power lines in the vicinity, WLAN networks in neighbouring flats or houses, smartphones, DECT telephones, powerline adapters, microwave appliances, audio gear, routers and mobile devices. The Plus+ tech increased effectiveness to treat larger cubic volumes and bandwidth, thus covers the 5G and emerging 6G bands.
Another key technical evolution increased the reactive speed at which the giga cancelling Plus+ modules in the reflector analyse and adapt to varying interference fields. Physically the reflector is an impenetrable aluminium brick, slightly larger than the piccolo at 90x90x45mm and equipped with a 220mm high-gain directional antenna. The reflector comes in kits of 2, 4 or 6 units, one of which acts as 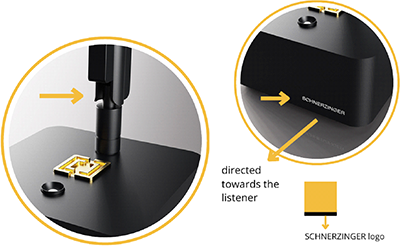 master again. Due to their strong directionality, all reflector units should point towards the acoustic focus of the room which in turn should be where we sit. The manual shows how to correctly orient box and antenna. The reflector costs significantly more than the EMI and piccolo protectors but a 2-unit set at €9'900 should cover the entire cubic volume of a smaller room and part of my test aimed at assessing just that. Similar to the piccolo, final placement is key to optimizing the effectiveness of the reflector. Schnerzinger offer some basic schematics depending on the number of units which I used as a starting point. In general, the optimal height is 1-1.4m off the floor. Ideally each reflector should point at our outer ear by unobstructed view.
After the units are optimally positioned in the room, further tailoring of the effect onto our specific EMI environment is performed by changing the position of the two rear switches. Even more cryptically than usual, these switches are simply identified as 1 and 2, with no hints given as to what they change. It is left to us to experiment which of the 9 combinations (0, I and II) works best for us. Note that master and satellite/s must share the same switch setting.