This review page is supported in part by the sponsors whose ad banners are displayed below |
 |
 |
With some reference points established and a hard drive to fill with music, it was time to put the tiny Music Server to the test. Could the Wyred live up to the dream of being an everyman device? Or would it prove itself approachable only by the certified techno geeks? Good news for the technically declined. The instructions provided for hook-up and implementation were reasonably straightforward and the basic learning curve proved quite shallow for the most part.
The Server is a network device but unlike some storage designs a sound room component, not hidden background device. It is married directly with your choice of DAC via interconnect to become a digital source. The Music Server will automatically rip your CD collection to FLAC but in terms of front panel functionality that's it. For the rest it requires an Ethernet connection to achieve network communication. This is crucial. The server relies on an Apple or Android wireless device and a choice of popular apps to access its own internal music files for playback. The iPad or equivalent becomes your visual interface and remote control. It is in fact your only control since the Server itself has no front panel functions. The network also allows the Wyred access to your computer, which in this configuration acts behind the scenes to service the needs of the Music Server and acts as workstation to acquire, edit and transfer music files to the server.
|
 |
Wyred prefers a hard-wired Ethernet connection. A wireless connection is possible but will require the use of a network extender and the manual recommends communication with your Wyred representative in that circumstance. It is not a major undertaking, just an extra step. An Ethernet cable will be required either way. Next step, hook up your DAC via connection of choice.
Power up the Server.
The power up/down procedure is simple but shows its computer heritage. Once you’ve gone from standby to fully on, the unit will take typically less than 2 minutes to boot and become available on the network. Time may vary slightly depending on the App being used. Going back to standby requires a short press of the button which initiates a 15-second internal shutdown procedure before the button reverts to green signifying standby mode. A prolonged press of the button constitutes a 'hard' shutdown and is not recommended as it can cause damage.
|
 |
Choose your interface. Open up your device of choice and pick one of the required compatible Apps. None are expensive. There are separate easy-to-follow instructions supplied for two of the most popular ones but alternate choices should be variations in procedure. Your choice of App opens the door for the availability of additional third-party applications like Pandora Mog and Last.fm and will dictate slightly different functional capabilities. MPaD is a $2.99 App that supports gapless playback but not Internet Radio. Squeezebox supports radio but not gapless. Recent additions are iPeng, which supports both and offers better resolution cover art; and Squeezepad both of which run $9.99. At the time of the review I chose MPaD.
|
|
|
Next step (in my case on the MPaD) was to open the Settings menu on the App, select MPD Server under connection, then W4S Server. That was followed by SAVE, OK and 'Click to Setup'' and thereafter I was in business ripping CDs moments later. (The latest version of the MPaD has slightly different procedures and further improvements.)
The ripping process was simple. Put the CD in the self-feeding slot label side down and away it went busily converting to FLAC. Once finished it spit the disc halfway out for easy retrieval. The MPaD then updated the database and cache, the screen populated and music was available. Press play. Turn up the volume on the preamp. Listen.
If CDs are your sole musical collection, the procedure of automatic burning to FLAC will be the entire process to amassing a storehouse of self catalogued music. Quick and painless. For those who already have file-based music, more steps are required and this is where the network goes from simple wireless remote to extended source material.
|
 |
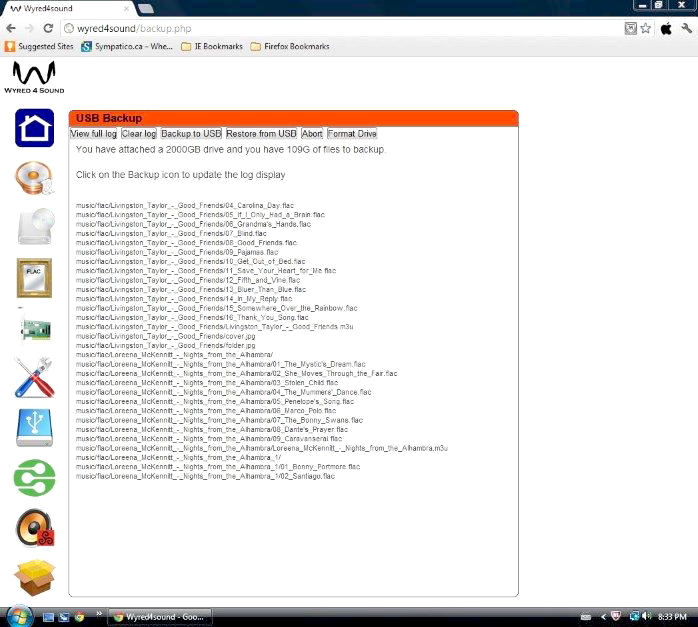
On your computer set up a web address in your browser http://wyred4sound (PC) or http://wyred4sound.local (Mac). This gives you access to the main program menu. While this contains vital information and control, I found that my main time spent here was with the USB backup facility. A basic rule applies to all things computer. No matter how well constructed, they fail. Routine back up guarantees the preservation of your music collection and your sanity when this eventuality occurs. Wyred has made it an easy two-click software procedure in this location. Press on the USB backup icon. Plug in your external hard drive. Do a one-time format to make the drive Linux friendly. Press the icon again and backup begins. Simple.
|
 |
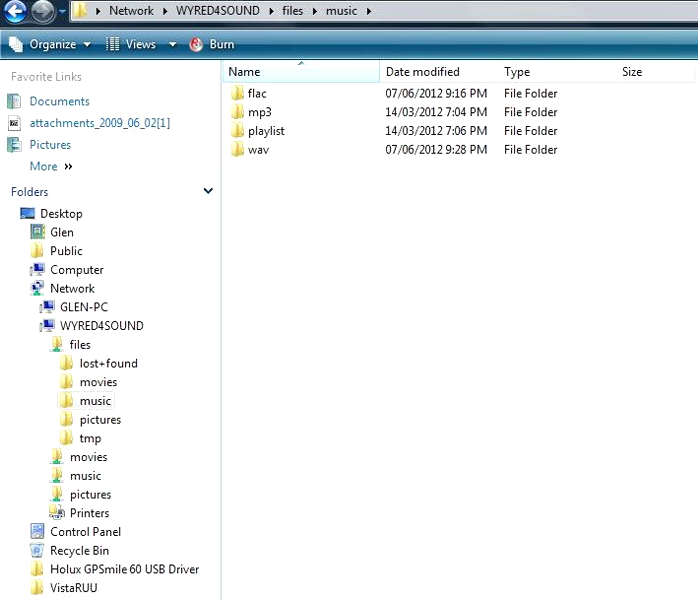
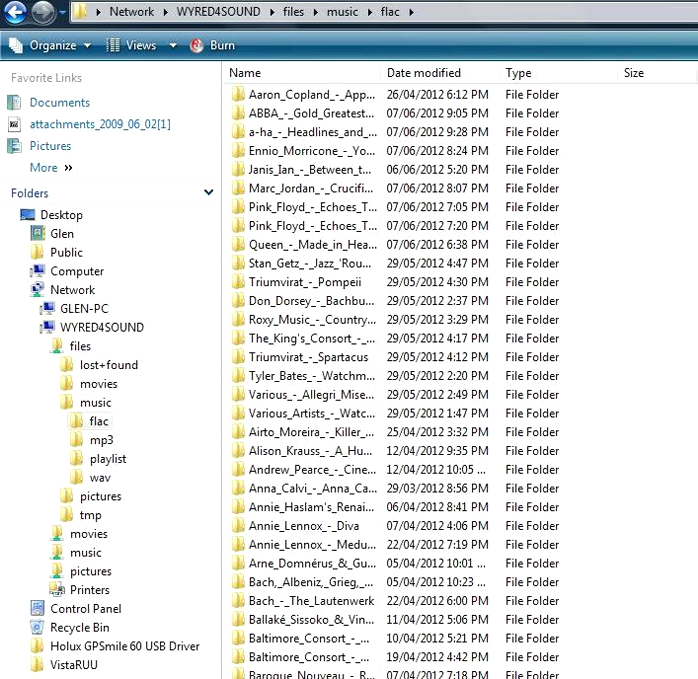
The procedures that saw most frequent use outside of basic CD ripping were those for manually transferring music files from the existing library on my computer. That went as follows. For the PC you are instructed to go to Network or Network Places. On the Mac the location was Finder. Under Shared locate 'wyred4sound'. On my PC there were a number of different icons with similar titles but only one 'WYRED4SOUND'. Creating a desktop shortcut at this point made life even easier. From here the workflow was pretty simple to follow and the main point you must remember is that all files are deposited into the FLAC folder regardless of type. The progression is logical. Files - Music - Flac and you’re in. Any compatible file can now be dragged and dropped or copy and pasted, including those gigantic Reference Recordings HrX WAV files. In practice there were a few wrinkles and basic provisos that popped up in specific instances but that’s about as complicated as the process normally got.
|
 |
|
|
|
|
Were there problems? As with all things software, a few quirks and anomalies manifested but only specific to MPaD. The primary one was cover art. The protocol of the program is simple. It uses Amazon and Discog to search for art based on embedded information. As secondary source it will look at the file to see if the cover jpeg is supplied. In that final circumstance there is a basic requirement - a matching naming convention. This is a parameter which you set up in the MPaD settings menu. The naming convention is case sensitive and the server names the files with lower case so if for example you stipulate the word cover as your convention, that’s the name of the jpeg artwork which MPaD will search for in all the files.
In rare situations the program had difficulties finding cover art. If the title was obscure, its information sources couldn’t locate it. If the file also contained no artwork the program had run out of options. That simply necessitated finding the appropriate cover art jpeg on line or creating one and dropping it into the file through the main computer with the chosen name, in my case cover. Drag and drop procedure. If the artwork was already embedded in the file but the naming convention was different from that set in MPaD, I simply had to go in and rename it to match. Once those conditions were accomplished, the process was one of pressing 'reload cover' in the selected album window in MPaD App. Presto, cover art. The only other challenge has been cover art for WAV files which requires a variation on the procedure, something that I‘ll get around to as time allows.
|
 |
  |
 |