|
This review page is supported in part by the sponsors whose ad banners are displayed below
|
|||||||||||||||
 |
|||||||||||||||
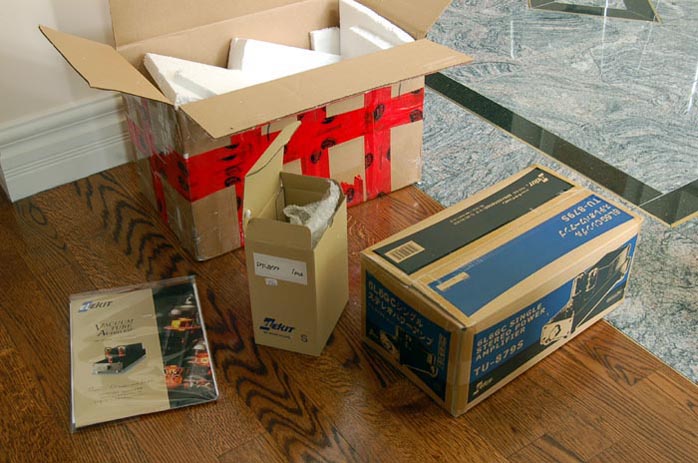
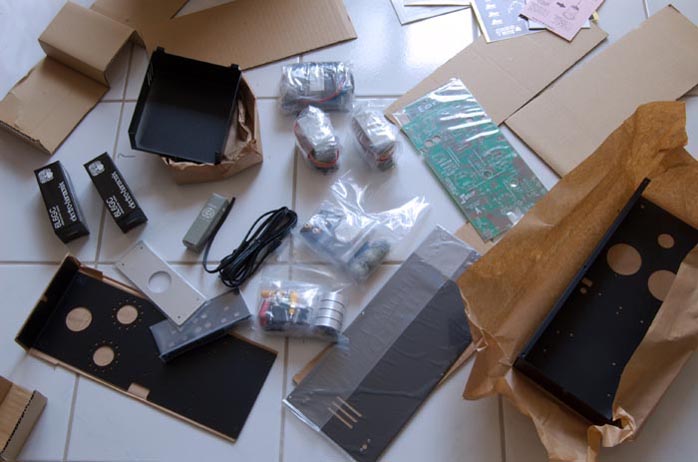
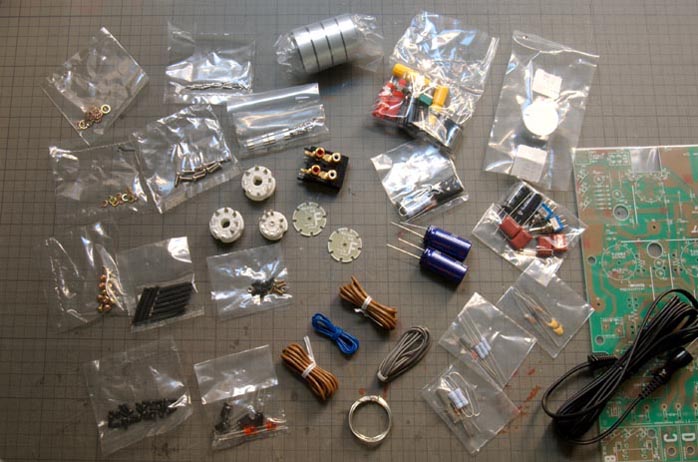
| The fun begins As soon as I opened the box, I knew this was going to be fun. I never built an amp before but building motorized models was a childhood passion. All the mechanical and electronic parts and tubes were well organized into groups of small plastic bags or environmentally protected with cardboard partitions or brown paper and neatly packed in a 9" x 7" x 16" carton. That made it child's play to unpack and lay out everything in groups ready for assembly. The English manual was packed in a bigger box that contained the factory-sealed kit box and the separately packed 120V power transformer. |
|||||||||||||||
 |
|||||||||||||||
Victor Kung should be commended for his translation of the massive instruction manual. It must have been one monstrous job including proof reading each minute detail. The English version faithfully retains the original layout, photos, illustrations and even measuring scale on the side of the pages from the Japanese manual, which is the best of its kind to begin with. Thorough, detailed, easy-to-follow step-by-step guidance is thoughtfully mapped out with check points at every stage. Diagrams correlate with markings and numbers on the PCB to insure no misplacement of parts - unless you don't pay attention. There is a total of 180 parts excluding the tubes and I made only three mistakes. |
|||||||||||||||
|
| |||||||||||||||
It took me 6 hours to finish the main PCB on the first day and another 6 hours to assemble the chassis, sockets and switches the following day. Most of the second day was wasted undoing mistakes of the first day. I didn't read the instruction carefully and a/, had the two fuse holders soldered to the wrong side of the PCB, and b/, didn't install the two toggle switches with "the groove faces towards the back". Removing these parts was extremely painful, especially the 6-terminal toggle. I thought about leaving them as is but the ON/OFF and INPUT 1/INPUT2 label would have been inverted. I did what I had to in the end and considered myself lucky that I tore only one of the copper foils off the PCB and had to salvage it with a point-to-point lead. The third mistake came on the second day with the NFB wires. I absentmindedly reversed left and right. I didn't notice this until I plugged the amp in for the first time to perform the ceremonial operations check. The squeaking oscillating sound from the amplifier correlated with the trouble-shooting chart on page 16 of the manual and was properly diagnosed and dispensed with in no time: "This is the amplifier oscillation. Check to see if L and R are correctly wired on NFB." Phew, that was an easy fix. |
|||||||||||||||
 |
|||||||||||||||
To help the less experienced DIYer like me, Victor has posted on his website the English version of the pictorial assembly guidelines. Though the manual remains indispensable, this pictorial guide would surely have helped me avoid my mistakes. While we're still on the manual, I must stress that it is the best I've ever seen, period. Not only does it do what is expected in a highly organized manner, it goes beyond the call of duty to include pages and pages of suggestions to achieve optimal performance. In addition to the trouble shooting chart, there is a page on health checks listing the correct DC voltage measurement of all three tubes at each pin as well as some electrolytic capacitors. Deviation beyond acceptable levels (in most cases +/-10%) indicates component faults. For those without a tube tester like myself, this is helpful in the future. Be sure to read each word in the warning section before proceeding. Electrical shock could be life-threatening. |
|||||||||||||||
 |
|||||||||||||||
After-sale service is comprehensive. A list of replacement parts clearly specifies value and descriptions with full schematics. To reflect the motto of the educational company, a fundamental diagrammatic guide on the construction of diode, triode and pentode tubes is also included. For the genuine DIYer who gladly embraces modifications at the expense of voiding the warranty, page 17 contains all the details on changing the amp to zero negative feedback, upgrading the volume control and coupling capacitors. The fun does not stop with final assembly if you don't want it to. |
|||||||||||||||
 |
|||||||||||||||
The finished product What you see is what you get. There is nothing fancy about the look of this typical DIY kit amp except for two small things that show attention to detail. First, the main PCB, tube sockets and R-core transformer are mounted to a 1mm steel sub panel which is then secured to the main chassis, doubling top panel thickness. Considering how some larger amps only run a single layer chassis, this compact amp is really sturdy. Second, the unique Elekit mechanical isolation footers come with four mix'n'match options: three or four footers, flat or ball-point contact. Two toggle switches control power on/off and input selection 1 and 2. Speaker terminals are marked 6 to 16 ohms and 3.2 to 5 ohms. The hard-wired power cord is a generic 2-conductor type. No IEC or power cord swap unless you retrofit. Stock tubes are two Russian Electro Harmonix 6L6EH and one Chinese CCI (Classic Components Inc.) 12AX7. I stash a reasonable collection of 6L6 power tubes but never tried the EHs. They sounded a little bright during break-in but I was captivated by their mysterious deep bluish purple luminance in the dark which reminded me of the deep-sea jelly fish in aquariums. At the base of the driver tube inside the chassis, the designer has appointed two orange LEDs to intensify that red-hot lava glow. |
|||||||||||||||
 |
|||||||||||||||
The basic integrated amp topography with one driver tube shared between two single-ended beam tetrodes is thoughtfully supplemented by power supply integrity. The Japanese TU-879S runs a 100V R-core power transformer made by Kitamura Kiden, the pioneer of this specialized technology since 1978. Hailed for its thin compact size, low magnetic flux, low heat, low noise, low stand-by power consumption and high overload tolerance all contributing to exceptional sonic characteristics, Kitamura Kiden R-core transformers have been widely used in high-end as well as household Japanese audio/video products from Esoteric, Accuphase and Marantz to Pioneer, Sony and Panasonic. The VK Music import arrives in its factory-sealed box with the original 100V R-core transformer packed inside. For safety reasons, VK Music strongly recommends that North American users switch to the 120V version of the same R80 Series Kitamura Kiden R-core transformer even though Victor has to import and sell those extra for little or no profit (occasionally at a loss even depending on the currency exchange of the day). |
|||||||||||||||
 |
|||||||||||||||
As expected for kit amps, the self-assembled product cannot be covered under warranty safe for the R-core transformer. But VK Music is confident to back up the parts (if proven to suffer manufacturing defects) with a one-year warranty and the tubes for 3 months. The ripple-suppression filter incorporates a K2750 π-MOS FET and the 135V DC supply to the 12AX7 tube heater is shielded with a 2mm thick steel panel. To prevent grid current from leaking into the grid control of the driver tube, coupling capacitors are in place to boost S/N ratio in general and to minimize noise when adjusting volume. These are polypropylene film types to ensure fast transient response and clarity. (However, purists who opt to take them out can follow the instructions on page 17 of the manual.) Electrolytic capacitors are not boutique brand items nor should we expect them with such budget kit. Nonetheless, they are the dutiful Panasonics and said to be of a low ESR rating. |
|||||||||||||||
|
| |||||||||||||||
 |
 |
||||||||||||||
 |
|||||||||||||||